
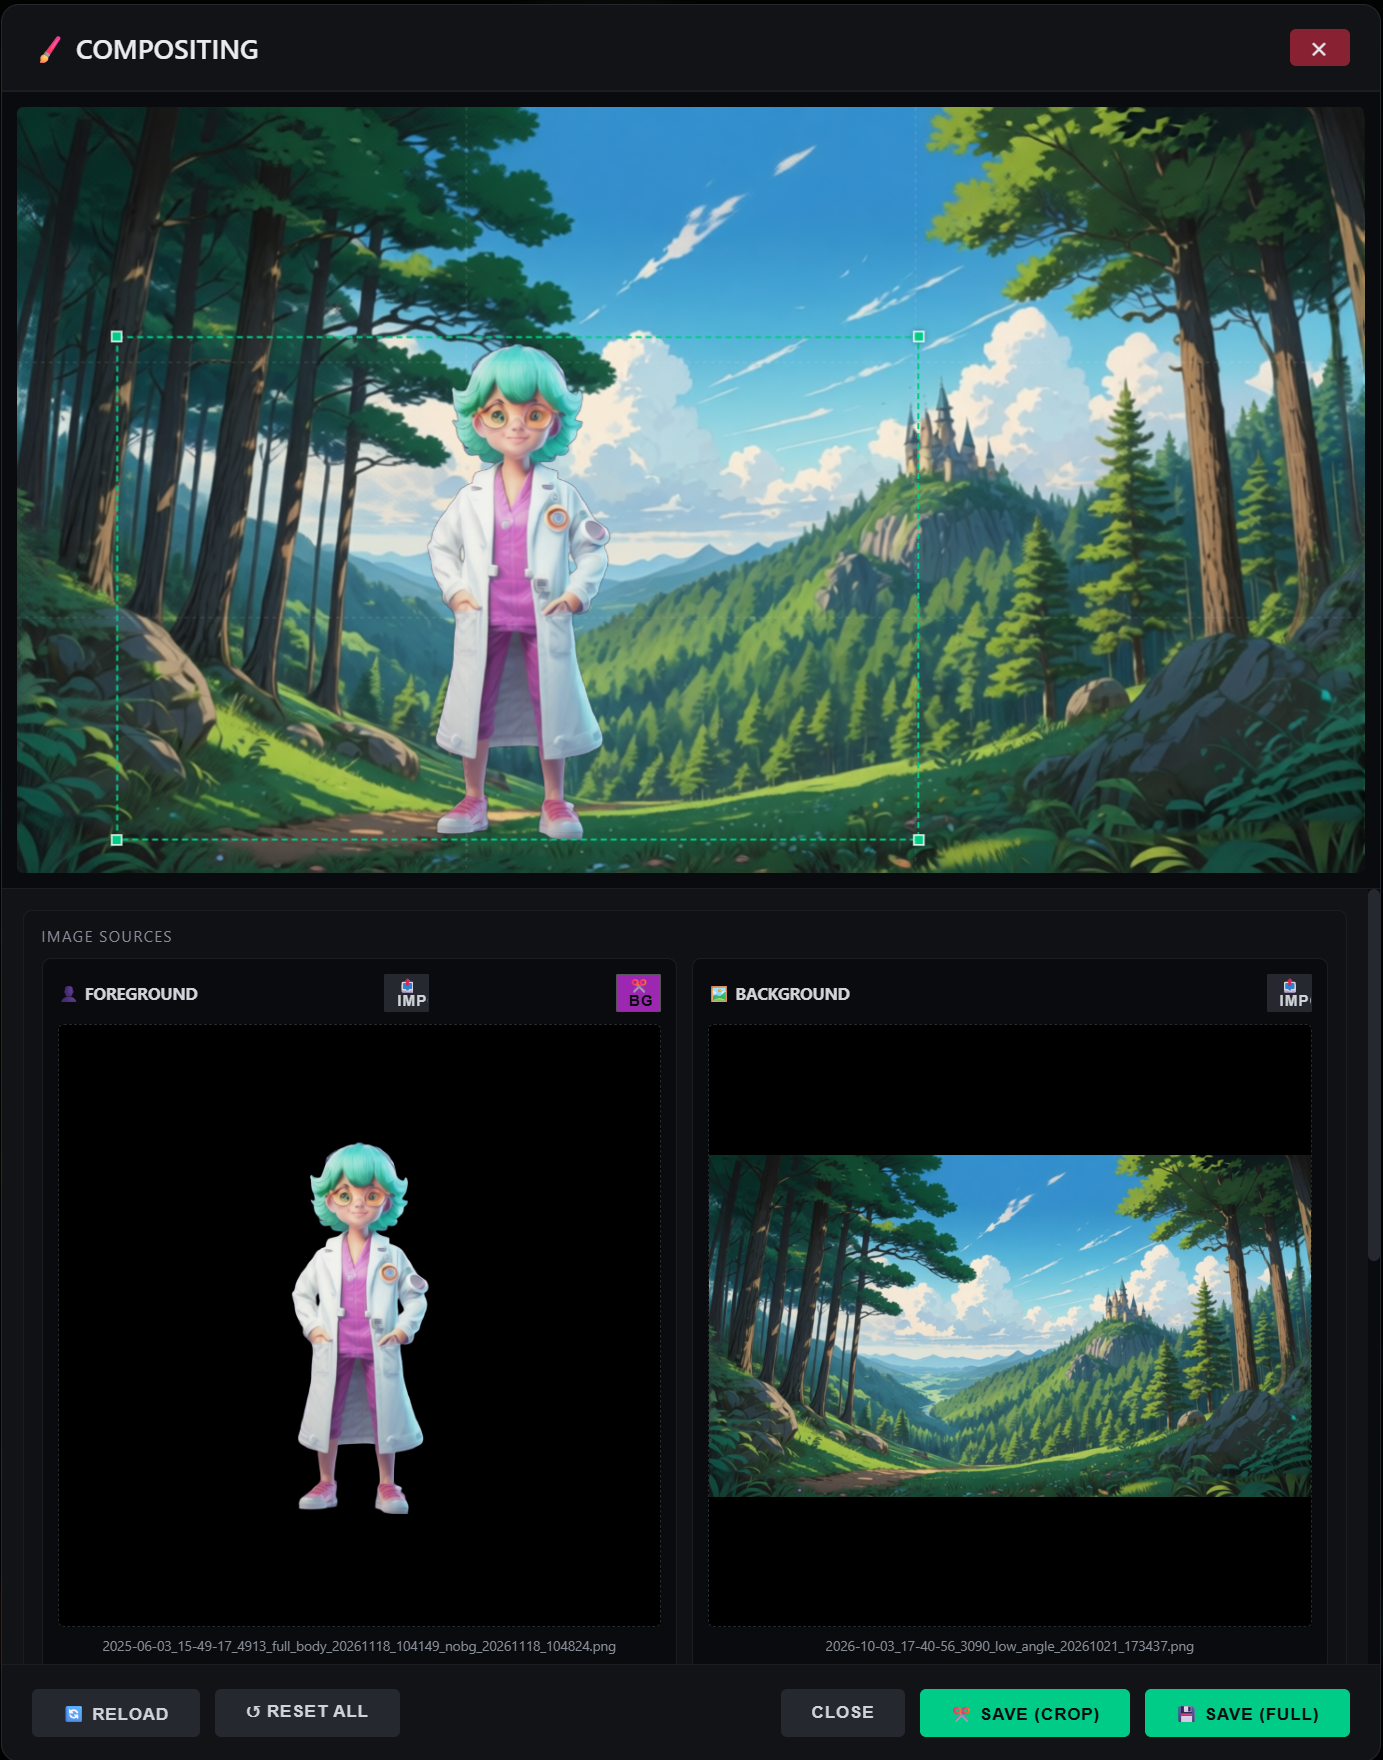
Generation and composition have historically been separate jobs done in separate tools. You generate a character on a green screen in one application, render a background in another, then open a compositing program to layer them together — matching scale, position, and perspective by eye, then exporting the result and importing it back into your video pipeline. Every hand-off is a place where quality leaks and time disappears.
Latent Core’s Compositing Studio collapses that separation. It lets you compose your shots in real-time, directly in the interface where you’re already producing your video — layering images, positioning green screen footage, and capturing the finished composite as a new asset without ever leaving the application.
The 2D → 3D → 2D Pipeline
To understand what the Compositing Studio does, it helps to see where it sits in Latent Core’s broader workflow. The studio bridges two distinct stages: 3D generation, handled by Trellis.2, and 2D video production, handled by LTX. The pipeline runs like this:
- Generate a 3D model from an image (via Trellis.2).
- Open the 3D Compositing Studio.
- Pick a background from your project.
- Place and adjust the 3D model — move, rotate, scale.
- Capture the composite as a new 2D PNG.
- Use that PNG as a Presenter or Background in LTX.
The logic is elegant. 3D generation gives you a character or prop that can be viewed from any angle with perfect consistency. But video generation works in 2D. The studio is the bridge: it lets you pose the 3D object in true 3D space, place it against your chosen background, and then flatten the result into a 2D image that the video generator can use as a standard reference. You get 3D consistency at 2D generation speed.
Opening the Studio
The studio is reached through the Asset Manager. You open any asset that has a generated 3D model, then click 👁️ Preview 3D. The studio opens with your model loaded and ready.
Choosing a Background
At the top of the studio, 🎯 Choose image… opens a mosaic picker showing every image in your project’s media library. Clicking one applies it as the background. The moment it’s applied, the 3D model is automatically re-framed to match the background’s exact aspect ratio — no manual adjustment needed to make the two elements agree on dimensions.
This automatic re-framing is a small detail with an outsized effect. It means the composite you build in the preview is already framed the way it will look when captured, rather than requiring you to guess how the crop will land. What you see is what you get.
True 3D Navigation
Once the model and background are loaded, you navigate in genuine 3D, using controls familiar to anyone who has touched Blender or 3ds Max:
- Middle mouse button + drag — orbit around the object
- Right mouse button + drag — pan the view
- Scroll wheel — zoom in and out
There’s no learning curve for experienced 3D artists, and the navigation is predictable enough that newcomers pick it up in minutes. The point of orbiting is precisely that it lets you find the angle you need: a three-quarter view that flatters the character, a low angle that adds presence, a profile that matches the background’s perspective.
The Transform Gizmo
To manipulate the model itself rather than the camera, the studio provides a visual transform gizmo with keyboard shortcuts borrowed directly from professional 3D software:
- W — Translate (Move), shown as red/green/blue arrows
- E — Rotate, shown as red/green/blue circles
- R — Scale, shown as small colored cubes
Clicking and dragging a colored axis constrains the movement to that axis alone, exactly as in Blender or 3ds Max. This constraint is what makes precise placement possible: you can slide a character horizontally without accidentally lifting them off the floor, or rotate them around the vertical axis without tilting them.
The gizmo makes the studio feel less like a bespoke AI tool and more like a familiar 3D viewport. That familiarity is deliberate — it lowers the barrier for anyone with 3D experience and gives everyone else a set of controls that behaves the way their intuition expects.
Capturing the Composite
When the model is positioned exactly as you want it against the background, you click 📸 Capture to Project. The studio hides the gizmos, renders the final image at the exact resolution of the background, and preserves the model’s exact position and scale from the preview. The composite PNG is saved to the project’s /images/ folder, and the Media grid refreshes automatically.
The studio stays open after capture, which matters more than it might seem. You can make multiple captures in a single session — the same character against three different backgrounds, the same prop in two different positions — without reopening the tool or reloading the model. Each capture becomes an independent image in your library, ready to be assigned to a segment or used as a reference.
Use Cases That Show the Value
The User Guide offers three concrete scenarios, and each illustrates a different strength of the approach.
Complex Characters. Generate a character in 3D, rotate it to a three-quarter view, composite it on a forest background, and use the resulting 2D image as a presenter reference in LTX. The character’s identity is established in 3D, where consistency is guaranteed by geometry rather than by prompt engineering, and then carried into 2D generation as a fixed reference. This is the pipeline’s headline benefit: 3D consistency at 2D speed.
Perfect Sets. Generate a prop — say, a vintage car — in 3D, place it exactly where you want on your background, and capture. LTX treats the composite as a standard background image, unaware that it was assembled from separate 3D and 2D parts. The result is a set that looks designed rather than generated, because the placement was controlled rather than left to the model’s interpretation.
Technical Constraints. Because the capture uses the background’s exact aspect ratio and resolution, the result is always broadcast-ready. No cropping surprises, no letterboxing, no discovering after export that the composite doesn’t fit the delivery format. For professional workflows, this eliminates an entire class of post-production fixes.
Why Real-Time Compositing Matters
The phrase “in real-time” is doing real work here. Traditional compositing is a render-and-review loop: you make an adjustment, render, inspect the result, adjust again. Each cycle takes time, and that time discourages iteration. You make fewer adjustments because each one is expensive.
In the Compositing Studio, the composition updates as you move the model. You see the character against the background at every step of the positioning. The feedback loop is immediate, so you iterate freely — trying a different angle, a different scale, a different placement — because the cost of trying is measured in seconds rather than minutes.
That immediacy, combined with the ability to capture multiple composites in one session, turns compositing from a bottleneck into an exploratory step. You’re not executing a plan you made elsewhere; you’re discovering the shot in the tool, which is how good composition usually happens.
Leave a Reply
You must be logged in to post a comment.