
The single biggest failure mode in AI video generation isn’t bad rendering — it’s inconsistency. A character’s jacket changes color between shots. The background shifts from a forest to a generic green screen. A prop that was on the table in scene two has vanished by scene four. Cloud generators treat each generation as an isolated event, with no memory of what came before. The result is a sequence of clips that look like they were made by different people on different days.
Latent Core’s Asset Manager exists to solve exactly this problem. It lets you lock your characters, backgrounds, and props into a persistent library that the AI remembers and reuses automatically across every shot. The result is perfect visual continuity — not through manual repetition, but through a system that injects your asset descriptions into each generation without you having to think about it.
Building Your Library
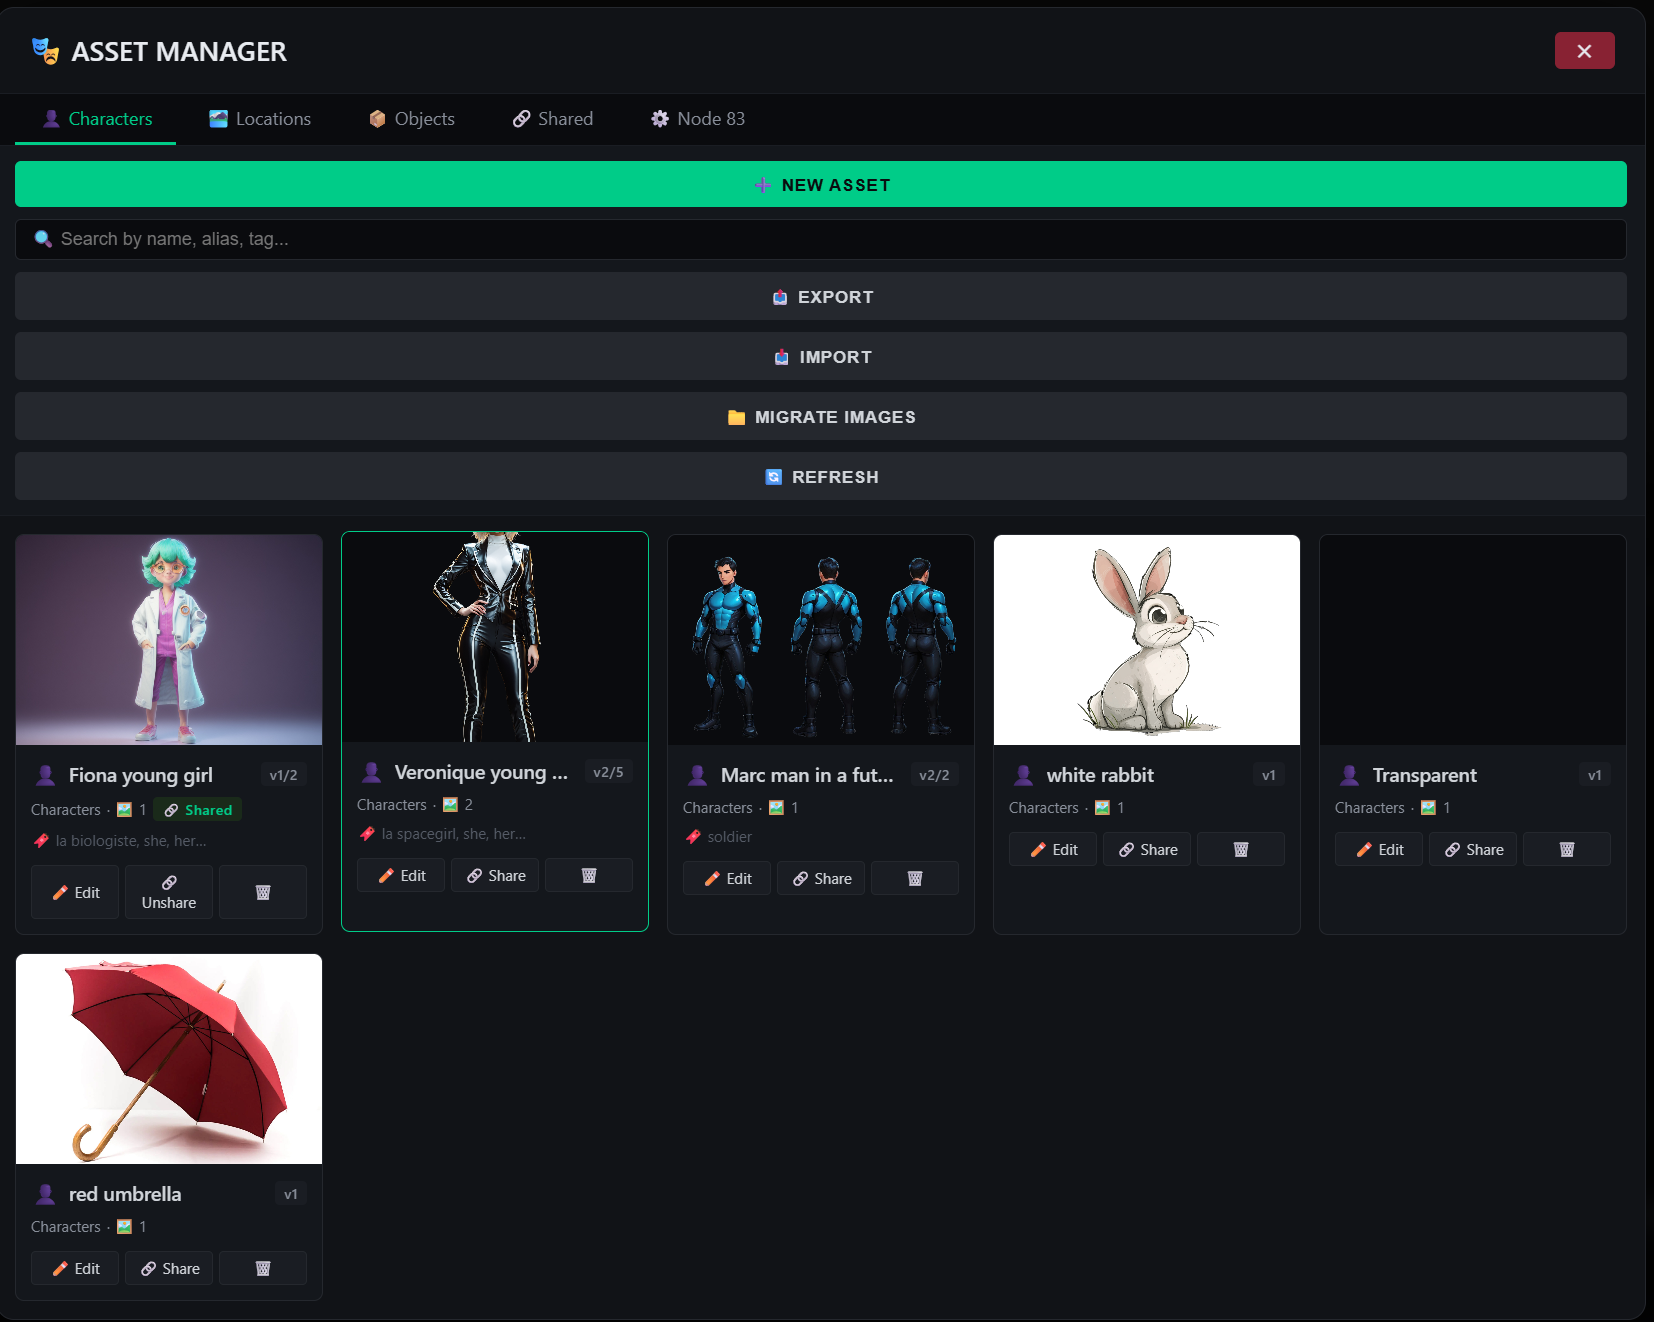
The Asset Manager organizes everything into five tabs, each serving a distinct role in your production:
- 👤 Characters — People: presenters, actors, avatars.
- 🏞️ Locations — Backgrounds, sets, environments.
- 📦 Objects — Props, items, accessories.
- 🔗 Shared — Assets shared globally across all your projects.
- ⚙️ Other — Configuration for the polyvalent slot (more on this below).
Creating an asset is straightforward. You click + New Asset, give it a name (say, “Sonia”), choose its category, and add aliases and tags. The aliases are particularly important: they tell the resolver which words in your script should trigger this asset. If Sonia is referred to as “she,” “her,” or “the biologist” in your script, you add those as aliases, and the system will detect her presence even when her formal name never appears.
You then attach reference images. The editor offers three routes: uploading from disk, picking from your existing project media library, or capturing the current frame of the video preview. That last option is quietly powerful — you can generate a scene, find a pose or expression you like, capture it as a reference, and use it to anchor future generations.
Auto-Describe: Let the AI Write Your Descriptions
Describing a reference image well is harder than it sounds. You need a full sentence for the language model, a short prompt fragment for the video generator, and a list of visual keywords — and all three need to be consistent with each other. The Asset Manager automates this with a single button.
If your asset has at least one reference image, you click 🤖 Auto-Describe from Image. Latent Core sends the image to ComfyUI, where Florence-2 and WD14 analyze it, and automatically fills in three fields: a Description (a full sentence used by the LLM), a Prompt Fragment (a short version injected into the generation prompt), and Tags (a list of visual keywords like “human, female, glasses, labcoat”). All three remain editable, so you can refine the output to match your intent — but the starting point is already good enough to use.
How the Asset Resolver Works
The heart of the Asset Manager is the resolver, which runs automatically before every video generation. Its job is to scan the segment script, match any known assets by name or alias, and assign them to the appropriate generation slots. The matching is scored:
- Exact name match — 100%
- Exact alias match — 80%
- Partial match — 50%
Detected assets are assigned to ComfyUI slots in a fixed order: the first character goes to the Presenter slot (the main identity), the second and third characters fill the secondary and tertiary reference slots, objects go to the polyvalent slot, and locations fill the background slot. This ordering ensures that the most important visual elements always get the highest-priority slot, without you having to configure anything manually.
The polyvalent slot deserves a note. In the ⚙️ Node 83 tab, you can choose what it receives: an object or prop (the default), a fourth character angle (if your script mentions four or more characters), or a style reference (reserved for future use). This setting is configurable per project or globally, so you can adapt it to the needs of each production.
Sticky Backgrounds: Continuity Without Repetition
One of the resolver’s most useful behaviors is the sticky background system. If a segment doesn’t mention any location, but a previous segment did, the resolver automatically inherits the last detected background. This means you don’t have to repeat the location name in every scene description to keep the setting consistent. A conversation that moves from a kitchen to a living room and back will keep the kitchen background in the segments where no location is mentioned, as long as the kitchen was established earlier.
The result is visual continuity that feels natural rather than mechanical. Scenes stay in the same place because that’s where they belong, not because you’ve manually copy-pasted the same background reference into every prompt.
Multi-Reference Assets: Consistency from Every Angle
A single reference image is often not enough. A character seen only from the front will drift when the camera moves to a three-quarter view, and a background captured from one angle may not hold up when the scene requires a different perspective. The Asset Manager addresses this with multi-reference support: each asset can carry multiple images, up to the slot limits defined by your license (two reference images on Lite, five on Pro and above).
Within an asset, you can mark one image as the ★ Primary reference — the one that defines the character’s core identity — and attach additional references for different angles, expressions, or lighting conditions. The V2V Editor extends this further with sub-slots for each reference: Face, Back, Face 2, Full Back, and Extra, each with its own strength and frame index. The generator uses these references together to maintain consistency across shots, rather than relying on a single fixed view.
For characters built in 3D, the Compositing Studio adds another layer. You can generate a 3D model, rotate it to a three-quarter view, composite it on a background, and capture the result as a new 2D reference image. That image then becomes a standard asset reference — giving you 3D consistency at 2D generation speed.
Validation and Manual Overrides
The first time an asset is detected in a segment, Latent Core asks for validation. A 🎭 badge appears on the timeline segment, and clicking it opens the Segment Assets modal, which shows exactly what was detected, with confidence scores, which assets were inherited from previous segments, and which slots were manually overridden.
From this modal you can re-scan the script, validate the detection, clear individual slot overrides, or clear them all. If the resolver picked the wrong asset — perhaps two characters share an alias — you can override the slot manually with the correct image. The system is designed to be transparent: you always know what the AI sees, and you can correct it at any point.
Versioning, Sharing, and Portability
Assets are living things. A character design evolves, a background gets refined, a prop gets updated. The Asset Manager handles this with versioning: when you edit an asset, you can either Save (updating the current version in place) or Save as New Version (preserving the previous version for later restoration). The 📚 Version History section lets you roll back to any previous state.
For teams working across multiple projects, the 🔗 Share button adds an asset to the global registry, making it available in every project via the Shared tab. And for backup or migration, assets can be exported as JSON — either lightweight (metadata only) or full (with images embedded in base64) — and reimported with three merge modes: merge, replace, or version.
Why This Changes the Workflow
The Asset Manager doesn’t just improve consistency. It changes how you approach a production. Instead of writing every prompt from scratch, describing the same character and the same setting over and over, you define your visual world once — the cast, the locations, the props — and then write scripts that reference them naturally. The resolver does the rest.
This is what “the AI remembers your assets” actually means in practice. Your characters stay themselves across shots. Your backgrounds stay put. Your props stay on the table. The AI handles the continuity, and you focus on the story.
Leave a Reply
You must be logged in to post a comment.